Magnets & Plackets: Keeping your shirt from drifting wide open.
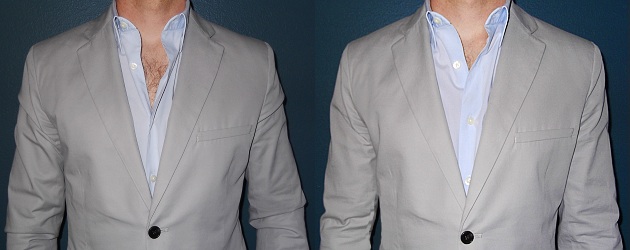
Above: Shirt by BR – $59.50, Blazer by GAP – $108
Sometimes undoing just the collar can look a little stuffy. But unbutton that second button, and a few hours later you risk looking skeezy if your shirt has drifted open and you’re hosting a chest hair parade. If only there were a button half way between your second and third, so you could prevent showing all of your sternum.
There kinda is. Here’s what you’ll need:
- A couple of small disc magnets. Either extras for your wurkin stiffs, or something like these
, or these which are even smaller (credit to Avisha in the comments for suggesting even smaller magnets).
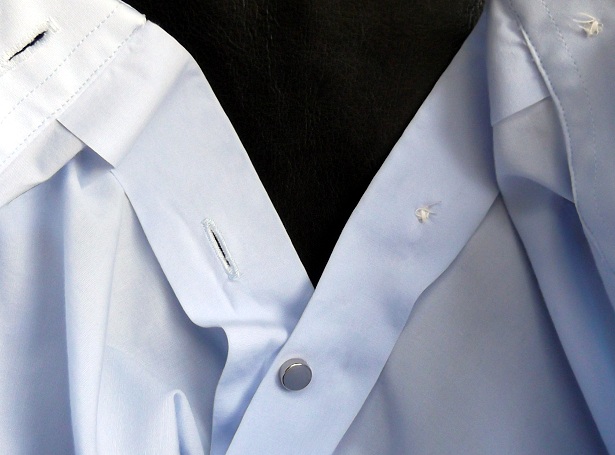
- A shirt with a french placket. Meaning, the side with the button holes simply folds over so on the inside of the shirt you’ve got a little flap, some space, and then the underside of the shirts exterior. They’re pretty common. The Express 1MX, BR Stretch Poplin, and most Target Merona’s have this style.
.

Step 1: Put your shirt on, button it except for the top two buttons, and leave it untucked. Take two disc magnets and hold one in your right hand. Keep the second magnet nearby on a table or something.

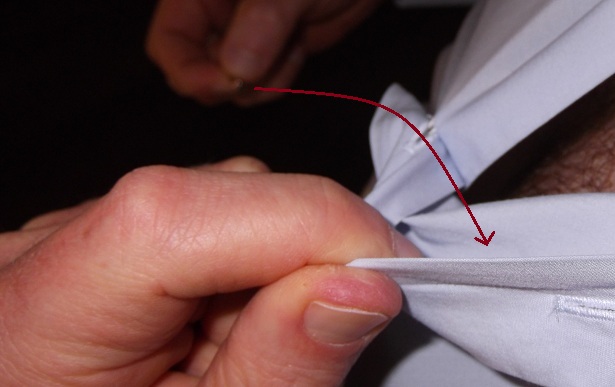
Step 2: About halfway between the second and third button holes, flip the placket over. Think of this flap on the underside as two slices of sandwich bread (or more accurately: a pita). The magnet in your right hand is the meat.

Step 3: Make the sandwich. Place the magnet in that fabric pocket made up of the placket’s flap and the inside of the shirt’s chest.

Step 4: As soon as your right hand has inserted the magnet, use your LEFT HAND’S thumb and index finger to hold the magnet between the two pieces of shirt fabric. It’ll want to slide around since there’ not a lot of friction between the metal magnet and the smooth shirting fabric.

Step 5: Grab the second magnet off the table with your right hand, and go up the inside of your untucked shirt from the very bottom. Line it up on the button side of the shirt across from the sandwiched magnet that your left hand is holding in place. This is what it’ll look like from the outside just before you make the merge.

Step 6: Make the merge. Slowly bring the two magnet backed areas of fabric together. This is what your shirt will look like from the inside, with the first magnet hidden between the placket fold on the left, and the second magnet holding your shirt closed on the right. Here’s an interior shot of what it looks like from the side.
And that’s it. It takes a little practice. While they don’t slide around as easily as wurkin’ stiffs do, you can re-adjust after you’ve made the merge. Is this over-thinking it? Probably. Does it work? Absolutely. Could you use a safety pin? That’s what the ladies do if they’ve got a top on that show’s too much cleavage for their liking, but this is easier, smaller, looks more natural, and won’t scratch up against your sternum all night.
WARNING: People with implanted chest devices (those who use pacemakers, Tony Stark) might not want to screw around with sticking magnets so close to their heart. So yeah, know that.
