Originally Published 8/15/11. NOTE: I, personally, no longer use starch. I found that over time, I got better at ironing and didn’t need the starch to make the shirts as crisp & wrinkle free anymore. Your results may vary. If you do choose to use starch, just go easy.
Too many men get thrown out into the world without a single lesson on how to take care of their clothes. If doing a load of laundry is like pumping gas, then ironing is like changing your oil. It’s not easy at first, but once you get the hang of it, you’ll be able to do it in your sleep.
The following is a 9-step guide and nothing more. Those who already know how to iron well will have their own system, and those that don’t will develop one over time. Try not to burn your place down.
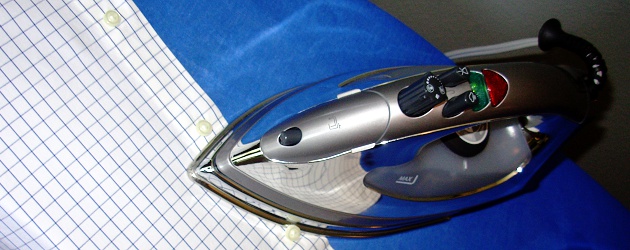
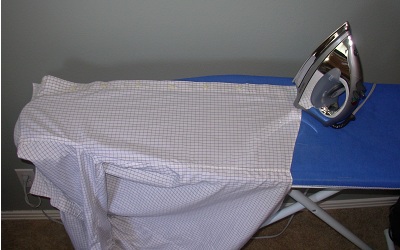
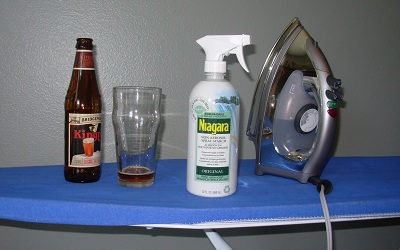
No reason that this can’t be at least a little enjoyable. Pilsners and Lagers seem to go best with outdoor manual labor. Beers that lean malty like ESBs or Reds seem to work better for the indoor chores. Bridgeport Kingpin out of Portland is great if you can get your hands on it. Bitch Creek from Grand Teton is a winner too. Sam Adams Octoberfest gets the job done and is everywhere. Oh, and you’ll need an ironing board, an iron, and light starch.
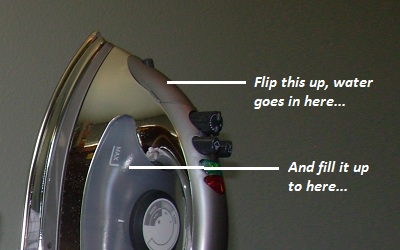
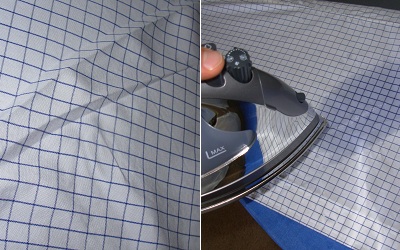
Pretty sure I lived on my own for at least two years before I realized that steam was a huge key to ironing. Heat and only heat just doesn’t work. Dumb? Absolutely. But no one has ever accused me of being a Rocket Surgeon. Guaranteed others have made that mistake. Tap water is ok, but if you have access to cheap distilled water or a Brita filter
A lot of us can’t stand ironing. So along with the beer, throw in one of your favorite movies, turn on a ball game, or listen to a podcast. You want something that you only have to pay attention to marginally. Your concentration will be on the ironing job, but, you still want an environment that’s somewhat fun and relaxing.
Are you right handed? The point should be on your left. If you’re a southpaw, flip that around. You’re going to want your dominant hand working the iron while threading the armpit of your shirts / crotch of your pants on the point. Pulling the garment taught against the point will give you a flat surface to press, and having the iron on your right side (if right handed) gives you a place to put it that’s not covered by the shirt or pants. Plus, you can manipulate the iron more easily by not working away from your body, but across it. It’s like throwing a baseball or football.
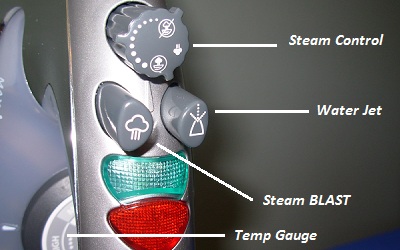
Most cotton garments can handle medium to medium high heat. Read those labels. Find your steam control knob and turn it up. The steam blast button is like a spin move in Madden. It’s your turbo boost. You become Bo, the wrinkles are a Tecmo Bowl defense. Use it at your discretion. The water jet is for mistakes. More on that later…
Try and smooth out the wrinkles with your hand first to get a good flat surface. You’ll develop (or have already developed) your own order on how you attack a shirt, but here’s just one example on how to do it:
One of the biggest pains is not getting part of a garment smoothed out correctly, and then accidentally ironing in a crease or wrinkle. It happens, but the water jet button allows you to shoot a stream of water on your mistake which will soak it through, and then iron over it to dry and press that wrinkle out.
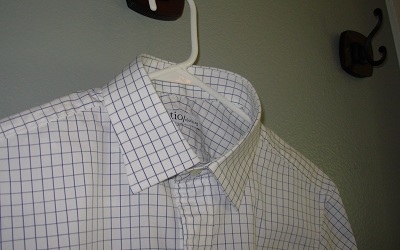
For shirts, a good plastic hanger will do. Button the top one or two buttons. Pants need a pants hanger (one of those cardboard covered wire hangers is fine.) As soon as you’re done ironing it, hang it up. The last thing you want is to re-wrinkle your stuff.
Most irons come with auto off features because, well, nobody likes a burned down house (unless you’re running some insurance scam.) Turn your iron off, unplug it, and set it somewhere steady and safe to cool. Put your ironing board away and hang your shirts in the closet. You’d be surprised how long an ironing board can sit out if you you don’t do this right away. Wipe hands on pants. Look around and admire your handiwork. Consider another beer.
.
Have any additional tips or questions? Those all go in the comments section. Here’s to wrinkle free…
It's their big one. Dress shoes & suits. Sneakers & shirts. Shoe trees, sunglasses, etc.…
Under $100 dive watches and driving loafers too.
For when it's straight up boiling. Performance fabric resort shirt. Wicking tech shorts. Knit, airy,…
A cool, smart casual look for when summer goes scrambled.
The first of three style scenarios (dressed up, smart casual, & casual) for when summer…
Rose gold tone/rubber strap is down to $189. Flagship stainless steel is 25% off. Ships…